Those of us that visit or live along the coasts are often out shooting in less than ideal conditions. There is something about the ocean meeting the land that attracts photographers looking for the perfect sunrise or sunset. Living along the Northern and Southern California coast and a stone’s throw from
Of utmost importance is your
safety. All coastlines are subject to
the rogue wave that is stronger than the preceding waves. Take some time when first arriving to scout
your locations or before shooting to watch the size of the waves and where they
land in relation to where you want to stand.
Add a safety margin for the rogue wave and check the tide status.
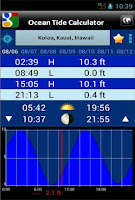
1. There are U.S. and International apps
available for Android or iPhones that we use frequently. When scouting a location, we verify the
current tide status for use when pre-planning our sunrise and sunset
shoots. You may want to shoot when the tides (and often waves) are higher to capture the action they present. You may also want to shoot when the tides are low, often exposing some good foreground subjects such as rocks. Whenever you decide to shoot, never turn your back on the ocean for more than a few seconds as the unpredictable rogue waves can be dangerous!
2. Watching the water for awhile often results in finding
wonderful water movement between features you
might miss. When shooting a scene with rocks or features
in the foreground, take your shot when the water recedes. Using a slower shutter speed (1/20sec or slower)
will give soft misty water paths as the water recedes. Where the water is
coming over rocks or features you may want to shoot the incoming water (see Image-1 below).
Again experiment with shutter speeds to get the effect you desire.
Image 1: Lava Rock Waterfall - Salt Pond Beach ,
West Side of Kauai
Canon 7D, EF-S
10-22mm @ 20mm, 1/20sec @ f16, 3 stop Graduated Neutral Density
3. Clouds are the second key to a great seascape. While it is preferable to have clouds present
there are those times when the sky is clear.
Photographers often add new backgrounds to an otherwise cloudless
image. We capture great cloud images
whenever we find them (see
Image-2 below) and might insert one once in awhile to replace a
cloudless sky. Just be sure to use one
with the right directional light.

Image 2: A Dramatic Sky Captured for
Future Insertion
4.
A stable camera is a must for shooting along the
ocean. Tripods allow you to keep one eye
on the ocean and still concentrate on the perfect time to trip the shutter. A
cable release is very handy and avoids camera movement. If the exposure is long (greater than a ¼
second), you may want to use your camera’s “mirror lock-up” to further reduce
vibration, especially at longer focal lengths.
Remember to turn-off in-camera or in-lens vibration reduction when the
camera is mounted on a tripod. When
shooting in sand, push your tripod down into the sand so it doesn't fall
over. Be sure to do this often as the
ocean swirling around the legs will loosen the sand and may cause your tripod
to fall over. If windy, add a weight to
the down-shaft of the tripod for additional stability. After shooting, stand your tripod in fresh
water for ½ hour to clear the salt from the legs and latches.
5.
We use graduated neutral density filters to balance the
brighter sky to the foreground. The “P”
size Cokin filters (see
Image-3 below) fit all of our lenses and offer a wide variety filtering
effects. Use of a full neutral density filter or circular polarizer will help
slow down your shutter speed if there is too much light to get the blurred
water you seek. A polarizer is also useful to reduce glare if there is sun
illumination shining perpendicular to the lens direction. A polarizer typically
reduces exposures by 2-stops.
Image 3: Cokin Filter System with
Graduated Neutral Density ND8
6 After shooting we wipe down our camera bodies and
lenses to remove the unavoidable salt spray and film. When cleaning glass be sure to gently use a wet wipe first to get the
dried salt crystals off before using a microfiber cloth for the final
wipe.
7.
You are usually going to get your feet wet so it is
necessary your footwear will provide adequate traction in wet and slippery
rocks. In Hawaii the water is 76-80 degrees year-round
and open water shoes with climbing soles work well. Along the California coast the water is 54-60 degrees
and you might want water proof shoes to avoid the cold.
Shoot safe,
Alan and Roger
Focus
In Paradise


No comments:
Post a Comment